18 April, 2024
Posted on 1 June, 2021
 Image by BFNatureCode from Pixabay
The team at Green Meadow Memorials recently collaborated with Shara McCuiston of The Woodshop Diaries on a step-by-step tutorial on How To Make a DIY Pet Keepsake Urn.
If you have pets, you know that they're family, too. And when you lose one, it's hard to let them go. But with pet cremation becoming more common lately, it's possible to keep them with you even after they've passed in a pet cremation urn.
But even if you don't want to use this project as an urn, this would make a great little keepsake box to keep a few special items—like a favorite toy, or a collar—in to remember them by.
So in this post, I'll show you how to make your own with some basic tools and lumber.
Once the box is complete, you can leave as is, but Green Meadow Memorials offers several different engraved plates and plaques you can add to the side or top if you wish.
For a project like this, I recommend using a good quality hardwood if possible. In this post, I used walnut for the small size and oak for the larger size.
For pet urns, there are usually various sizing options. The small one shown here works for most pets up to 50 lbs and the larger one works for most pets up to 120 lbs if you are planning to use this as an urn.
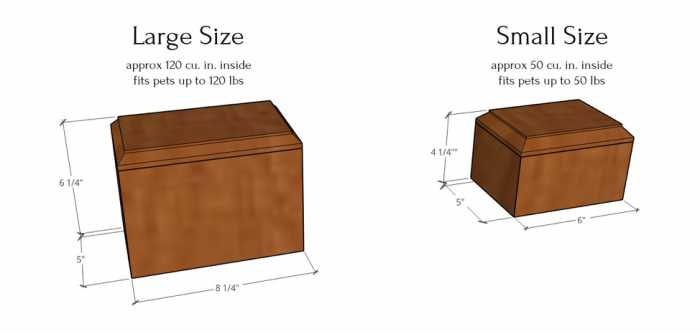
Image Source: Green Meadows at www.greenmeadowmemorials.com/how-to-build-a-diy-pet-urn
The construction process is the same for both, but the sizing is just a little different.
For the small urn, the sides are made from standard 1" x 4" and the top is cut from a 1" x 6". For the larger urn, the sides and the top are both made from standard 1" x 6" boards.
For the bottom of both of these boxes, I used a small piece of ¼" plywood screwed in place.
To get started, I began cutting the pieces for the sides. The corners are mitered here, so I set my saw up to cut a 45 degree angle.
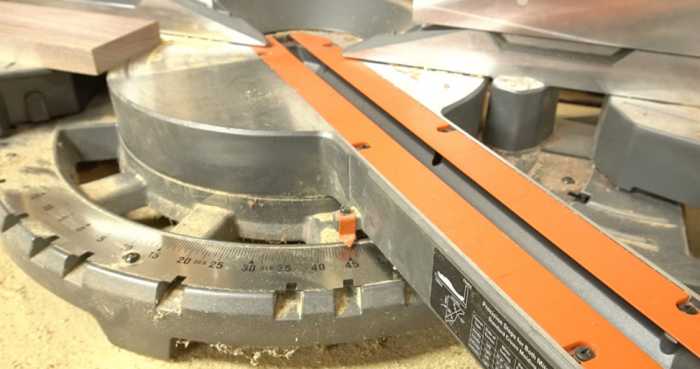
Image Source: Green Meadows at www.greenmeadowmemorials.com/how-to-build-a-diy-pet-urn
For the small urn, I trimmed the end off the board to give it a 45 degree angle, then cut a piece 5" long.
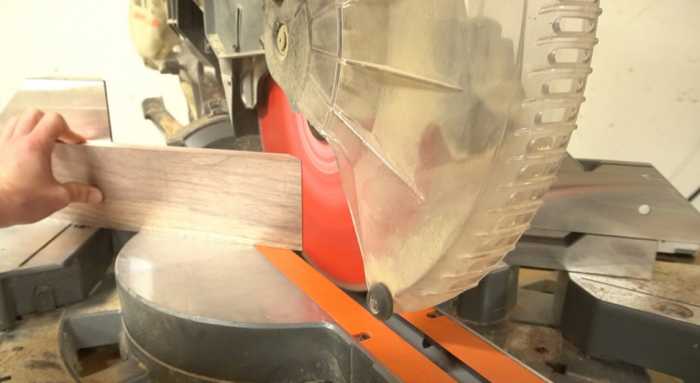
Image Source: Green Meadows at www.greenmeadowmemorials.com/how-to-build-a-diy-pet-urn
I kept the saw set at 45 degrees and cut another 5" long piece and then two 6" pieces to make four sides of the box.

Image Source: Green Meadows at www.greenmeadowmemorials.com/how-to-build-a-diy-pet-urn
Small Urn Dimensions
Now, the larger version is done exactly the same way here, only the pieces are cut from 1" x 6" boards and the lengths of the sides are 5" and 8 ¼".
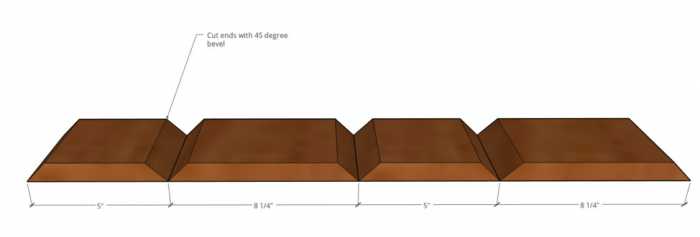
Image Source: Green Meadows at www.greenmeadowmemorials.com/how-to-build-a-diy-pet-urn
Large Urn Dimensions
If your miter saw isn't big enough to make the cuts this way, you can turn the miter angle back to zero and set your bevel angle (the blade TILT angle) to 45 degrees to make the cuts with the board lying flat instead.

Image Source: Green Meadows at www.greenmeadowmemorials.com/how-to-build-a-diy-pet-urn
Since the bottom of the urn is inset into the box, I needed to route a small rabbet along the bottom edge of the pieces. I used a ¼" rabbeting bit in my router and cut a ¼" deep by ¼" wide rabbet along the bottom edge of all four pieces like shown here.
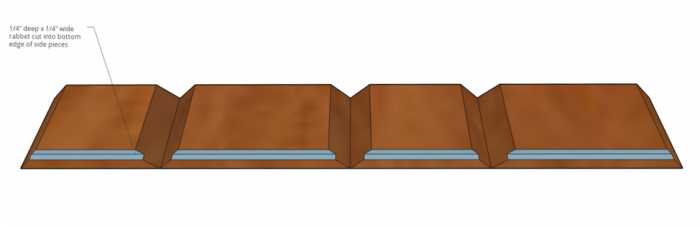
Image Source: Green Meadows at www.greenmeadowmemorials.com/how-to-build-a-diy-pet-urn
If you had a table saw, you could also cut these on a table saw if you'd rather. And if you don't have either, you don't have to cut the rabbets—this is an optional step.
Before assembling, I gave the pieces a quick sanding—if you don't have a sander, hand sanding with 220 grit paper works fine here.
Then, I laid the pieces out on the workbench alternating the long and short sides of the box. I applied painters tape along the inside edges to help catch the glue squeeze out.
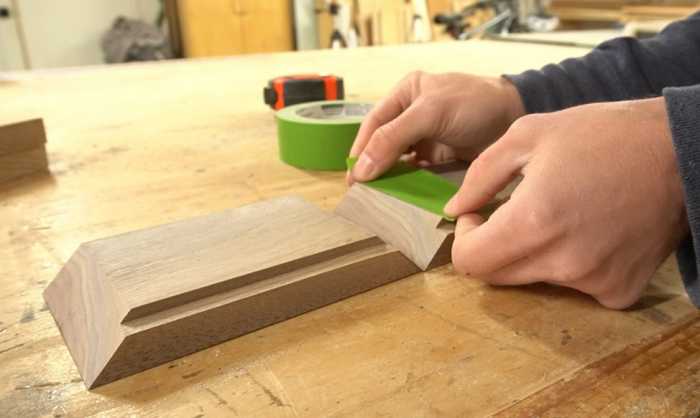
Image Source: Green Meadows at www.greenmeadowmemorials.com/how-to-build-a-diy-pet-urn
Then I flipped the pieces over and taped the outside joints.

Image Source: Green Meadows at www.greenmeadowmemorials.com/how-to-build-a-diy-pet-urn
I applied wood glue liberally along all the corners, folded the box together and taped the last corner.
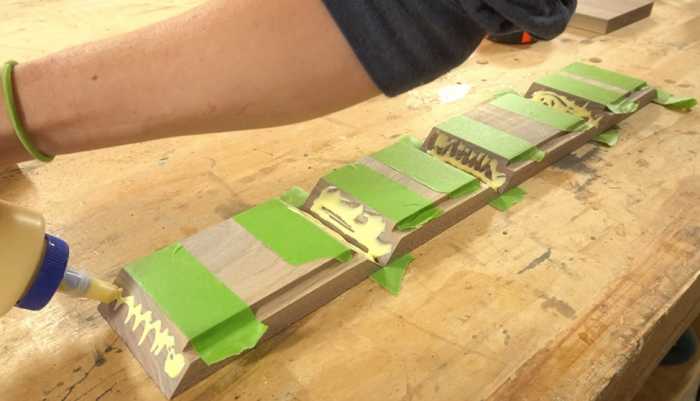
Image Source: Green Meadows at www.greenmeadowmemorials.com/how-to-build-a-diy-pet-urn
To keep the glue squeeze out from curing and sticking the box to the workbench, I set it up on some scrap wood so it could drip off until it was dry.

Image Source: Green Meadows at www.greenmeadowmemorials.com/how-to-build-a-diy-pet-urn
By the way, if you have a ratchet strap, this works well as a clamp if you need a little extra pressure on the corners to get them tight.
After the glue was dry, I removed the tape and chiseled out any large glue chunks from the rabbeted corners. If there are any gaps at the corner joints, you can putty with regular wood putty or a mixture of sawdust and wood glue.
To add the top, I cut a 1" x 6" the length of the box (this should be 6" for the small and 8 ¼" for the large size), then set the box on top and marked where to trim the edge so it would fit flush. You'll need to trim about ½" off the side.
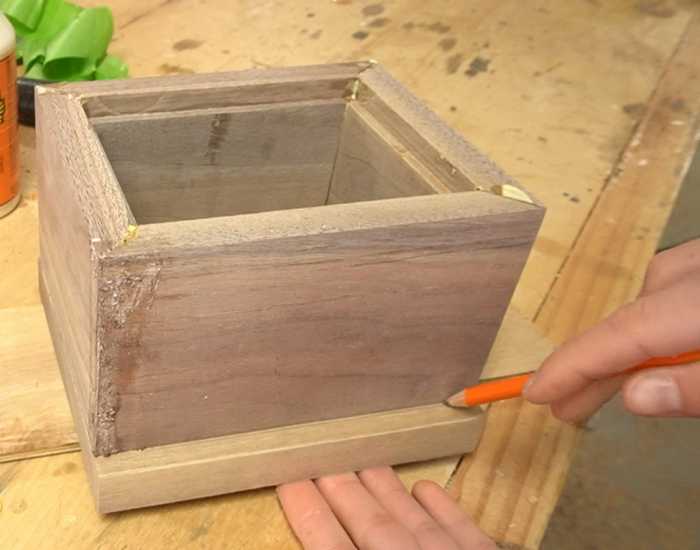
Image Source: Green Meadows at www.greenmeadowmemorials.com/how-to-build-a-diy-pet-urn
I trimmed off this piece on the miter saw, then glued the top in place. You can use clamps or a heavy object, or even painters tape to hold the piece in place until it's dry.
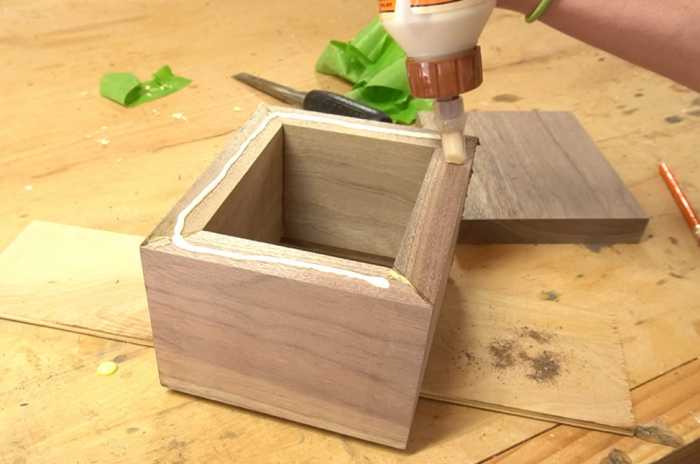
Image Source: Green Meadows at www.greenmeadowmemorials.com/how-to-build-a-diy-pet-urn
This process is the same no matter which size you are making.
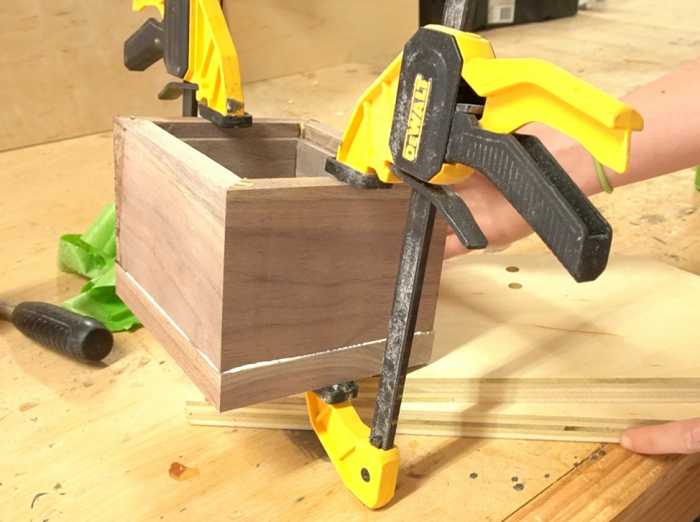
Image Source: Green Meadows at www.greenmeadowmemorials.com/how-to-build-a-diy-pet-urn
After the glue was good and dry, I used a flush trim bit in the router to clean up the edges around the top. If you don't have a router or flush trim bit, you can simply sand these edges nice and flush as well.
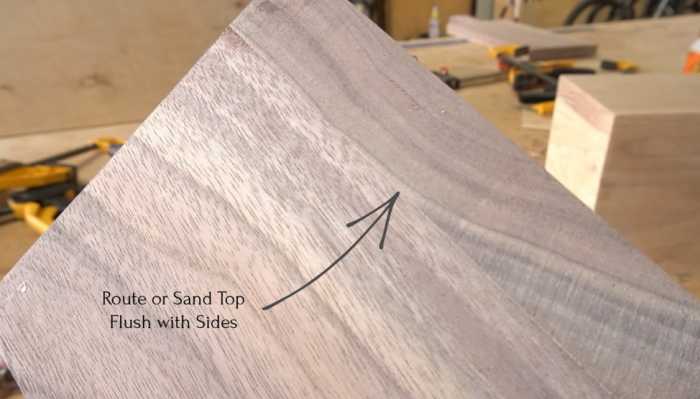
Image Source: Green Meadows at www.greenmeadowmemorials.com/how-to-build-a-diy-pet-urn
Then I used a chamfer bit in my router to add a decorative edge detail along the top.
This is optional—you can leave the top edges square if you want, and you could also use a round over, or Roman Ogee if you prefer a different edge design.
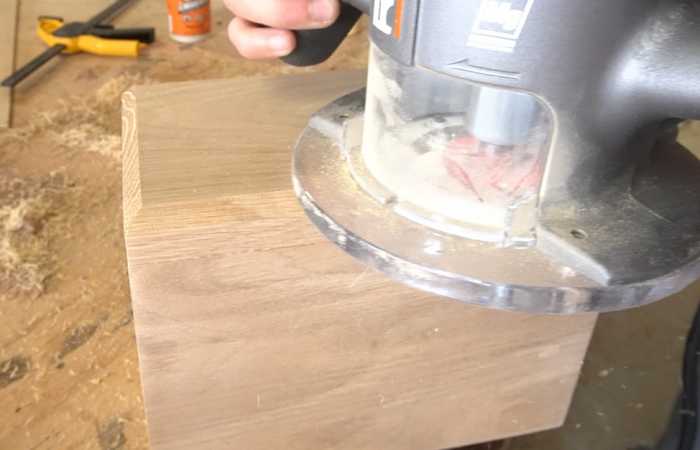
Image Source: Green Meadows at www.greenmeadowmemorials.com/how-to-build-a-diy-pet-urn
The final step is adding the bottom panel. For the bottom, I cut some small pieces of ¼" plywood to fit into the bottom rabbeted edge of each urn. It should be about 4" x 5" for the small size and 4" x 7 ¼" for the larger size.
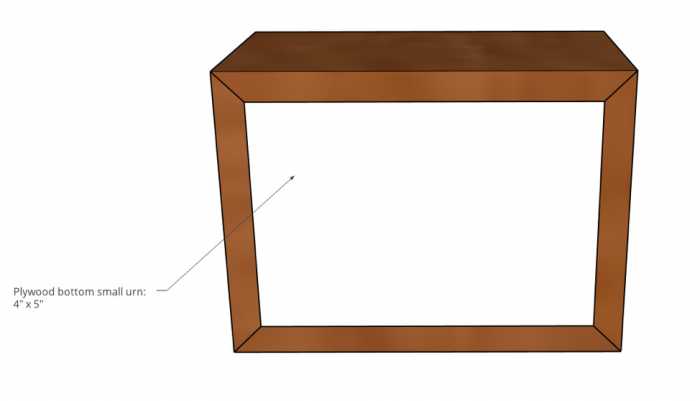
Image Source: Green Meadows at www.greenmeadowmemorials.com/how-to-build-a-diy-pet-urn
Small Pet Urn Bottom Panel Dimensions
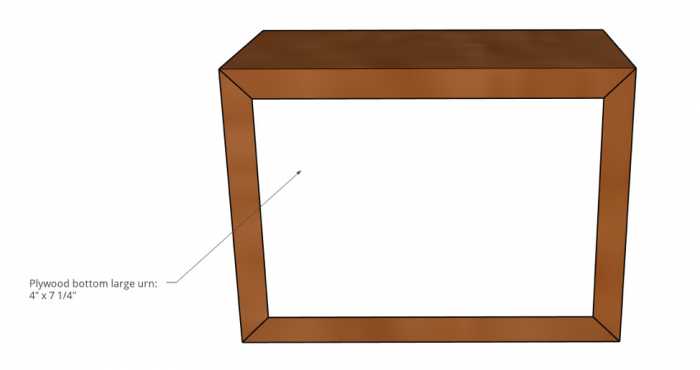
Image Source: Green Meadows at www.greenmeadowmemorials.com/how-to-build-a-diy-pet-urn
Large Pet Urn Bottom Panel Dimensions
The surface to attach is pretty small, so it's best to use some small screws here. I predrilled holes and attached with small 5/8" long wood screws on each side.
If you don't have a router and weren't able to complete step 2, you can cut your panel a little bigger to fit over the entire bottom and simply screw this panel in.
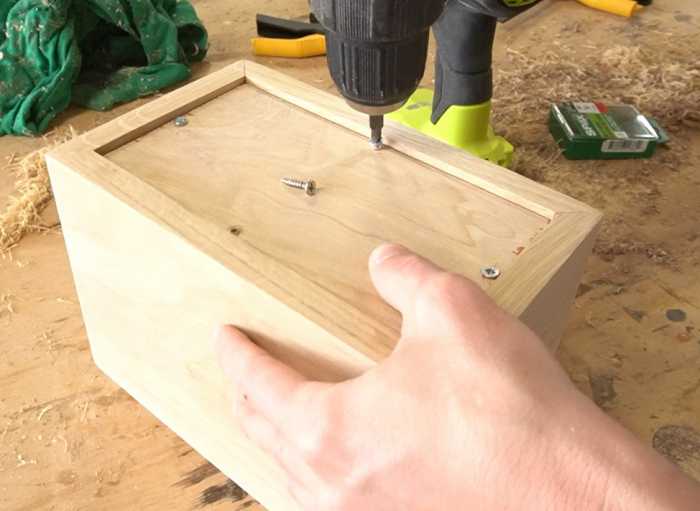
Image Source: Green Meadows at www.greenmeadowmemorials.com/how-to-build-a-diy-pet-urn
You can finish how you wish—paint, stain, or poly. I just applied some furniture wax to protect and seal the natural wood.
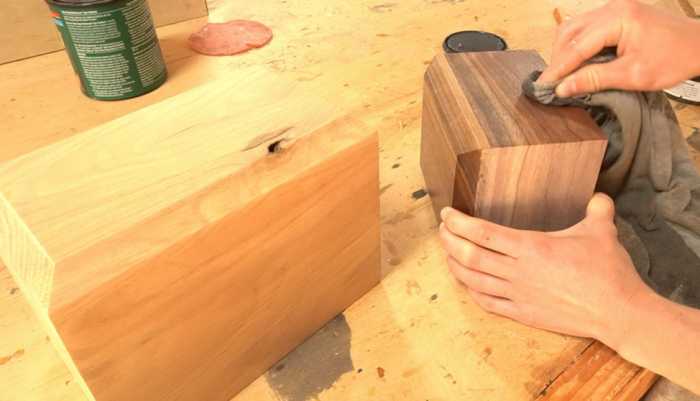
Image Source: Green Meadows at www.greenmeadowmemorials.com/how-to-build-a-diy-pet-urn
At this point, the urns/keepsake boxes are complete, but if you wanted to add a personalized touch, Green Meadow Memorials offers these customizable plates you can add to the side.
They've got several styles, designs and sizes that will fit either of these size urns.
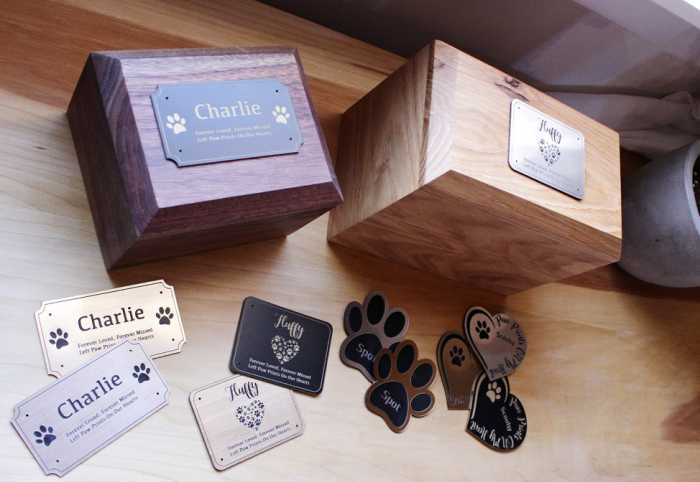
Image Source: Green Meadows at www.greenmeadowmemorials.com/how-to-build-a-diy-pet-urn
Some simply peel and stick on, and others attach with tiny finish nails that come included with the plate.
Making a nice, custom pet urn or keepsake box doesn't have to be complicated or difficult. With a few basic tools, you can build a simple pet urn made with hands that loved them.
About Shara & Woodshop DiariesShara is the author behind the DIY and woodworking blog, Woodshop Diaries. She is a fearless DIYer with a passion for corny dad jokes, black coffee, acoustic guitar, and calculus. You can find her building furniture in her shop and sharing her journey on WoodshopDiaries.com and on her YouTube channel.
To read the original article, please visit - www.greenmeadowmemorials.com/how-to-build-a-diy-pet-urn
Tags:
Share this:
![]()